The New Year always brings new resolutions and they often have something to do with food. Usually it’s resolutions about what not to eat. But I believe you should think less about what you shouldn’t eat and more about what you should, so one of my resolutions this year is to eat more fermented foods. I keep reading about how healthy they are. We try to avoid overly processed food around here so that means learning the art of fermenting at home. My husband was so excited about this idea that he offered to write the first post on how to ferment your own sauerkraut. I’ve never had someone guest post for me before, but who better than the man who taught me how to cook? Take it away, Sweetheart!
Hi, I’m Daniel and I’m here to tell you that fermenting foods is fun and easy. I’m just a caveman, and now even I can do it. I’d recommend starting with sauerkraut, otherwise know as European style fermented cabbage. I guess “sauerkraut” is a better name. Cabbage and sauerkraut naturally have lots of good lactobacillus bacteria which makes it really easy and kind of fool-proof from a fermenting standpoint. To make it even easier, we got a set of these awesome Fermentool lids from the folks at www.fermentools.com. We got them in exchange for documenting our fermenting journey online, but after using them for a couple of months, I would buy them happily and recommend them fully, even if we weren’t blogging about it.
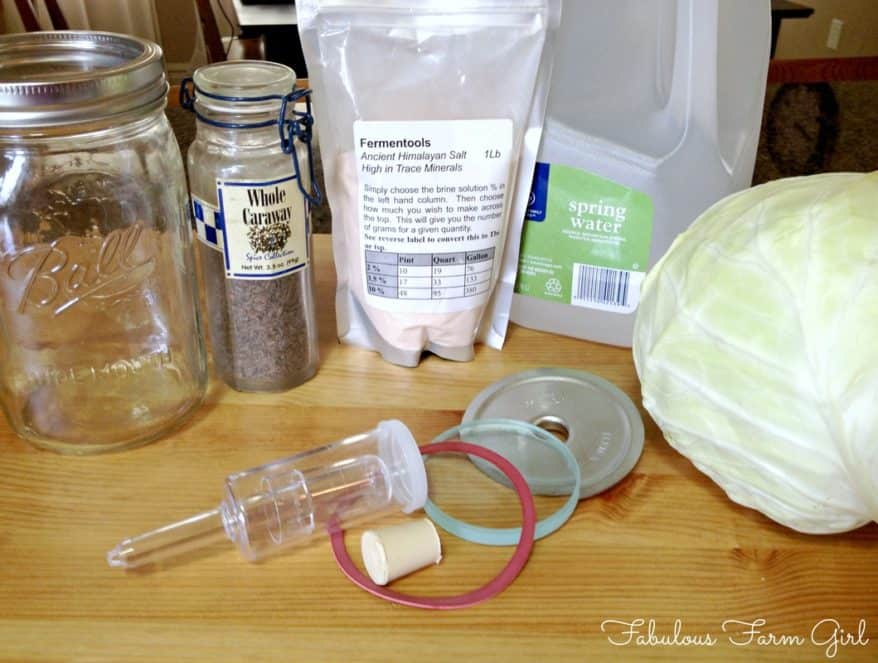
You’ve gotta love a recipe that has just one ingredient (not counting the salt) and two if you decide to spice it up a bit. I always like to spice it up a bit but you can take it slow if you want to. All you really need for homemade sauerkraut is cabbage, salt and a mason jar. You also need some lactobacillus and a few other good bacteria but they’ll show up on their own as soon as their dinner is served.
Check out the economical airlock systems at Fermentools.com. They set you up for fermenting success by turning wide-mouth quart mason jars, which you probably already have, into Old World style crocks without the expense. This makes your whole fermentation system cheap, reusable, and really easy. Using mason jars means you can inexpensively launch into small-batch experimentation, and experimenting, my friends, is what fermenting is really all about.


Making sauerkraut could not be easier or faster. Just cut up the cabbage, mix it with the salt and add-ins, pack it in your jar, cover with your brine and close it up. Leave it undisturbed for about 3 weeks and then get ready with some hot dogs or bratwurst because you’re gonna want an excuse to eat this stuff as soon as possible.

Always lift the jar by the bottom or middle of the jar and not by the lid, and try to move it carefully, not tipping it too much. Put the jar in a location that’s fairly dark and that’s going to provide a steady temperature of between 67 and 74 degrees Fahrenheit. We use our pantry shelf.
Label your jar with the day you started so you can check your kraut in in seven days. You can visually check it before then, but don’t mess with it unless your brine is starting to overflow. If that happens, then just drain the brine until it’s about 1 inch below the top and replace the lid. If you have a Fermentools kit, you can lift your plastic airlock lid after about 5 days just to begin smelling the wonderful aroma of your blooming kraut. Ahh! Heaven!
After 7 days, take off your lid to smell and taste your kraut. It will still be fairly crunchy, but in the 7 to 10 day range your jar of kraut will be peaking in its strength of flavor and sourness. It’s already a great tasting and healthy food, full of Vitamin C and plenty of readily available good bacteria and probiotics for the health of your gut. I prefer to pop it in the fridge at this point. But the rest of my family prefers a mellower sauerkraut, so we usually leave it in the pantry for a total of about 20 days before putting it in the fridge. We’ve experimented by leaving it in the pantry for a little over 30 days, but didn’t find there to be much difference between the 20 day kraut and the 30 day kraut, so why wait?
After you put it in the fridge, your kraut will continue to soften and expand, but at a much slower pace because of the cold temperature. You’ll probably want to eat it within 6 months, but it hardly ever lasts that long because of its Tastiness Quotient.
Just look at the difference between our homemade sauerkraut on the left and the stuff we bought at the store on the right. The store-bought stuff was all soggy, salty and sour. It doesn’t even look like real food and my Fabulous Farm Girl wife thought it tasted like Elmer’s glue. Our homemade version was crisp and bright and actually tasted like…sauerkraut. Truth is, we didn’t know what sauerkraut was supposed to taste like until we made it ourselves. Turns out, it’s delicious.
Once you have tasted the sweet success of your own home-fermented sauerkraut, you’ll never go back to the store for their pathetic imitations ever again. And now your more than ready to venture into experiments with beets, carrots, dilly beans, and everyone’s favorite–pickles. If I have my way, the fermented foods of the world will soon be appearing at our kitchen table. Kimchi here I come (I’ll keep you posted).
Until next time,
–Daniel
Homemade Sauerkraut
1 wide-mouth mason jar with its wide-mouth ring
1 wide-mouth lid or one Fermentools airlock lid, seal and airlock
12 oz. cabbage, your choice of variety (approx. 1/2 large head)
1 qt. distilled or spring water (or other non-chlorinated water)
19 g (1 tbsp. + 1.5 tsp.) fine-grain pickling salt, sea salt or other non-iodized salt (we use Fermentools Himalayan Pink salt)
Optional add-ins (choose one)–1 tsp. caraway seeds, 1 tsp. dill seed, 1/2 tsp juniper berries, 1/2 tsp. peppercorns or other spice or herb of your choice.
1. Combine water and half the salt in a measuring cup. Stir to dissolve. Set aside.
2. Cut up cabbage very small and place in medium bowl. Add remaining half of the salt to cabbage and mix. Add herbs if using and mix to combine. Let cabbage sit and sweat for 10-15 minutes.
3. Pack the chopped cabbage into the empty jar until it is about 3/4 full, making sure to add any liquid from the bottom of the bowl. Don’t fill the jar more than 3/4 full because the cabbage will expand during fermentation and soak up the brine.
4. If you have a kit from Fermentools, put one of the glass weights on top of the cabbage. Pour in enough of the brine to fill to about 1 1/2 inches over the top of the cabbage, which should be about 1 1/2 inches from the top of the jar. Put on the seal, special lid, airlock and your own ring per their instructions. Screw down the ring moderately tight. Discard remaining brine.
5. If you don’t yet have the Fermentools system, fill jar with brine as described in #4 above, then put the mason jar lid on upside-down (since you don’t want a super-tight seal) then lightly screw on the ring. Discard remaining brine.
6. Put the jar in a fairly dark location that’s going to provide a steady temperature of between 67 and 74 degrees Fahrenheit. Leave undisturbed for 3 weeks. After that time, open jar and taste. If it tastes good, and boy will it taste good, replace lid and store it in the fridge.
Eat within 6 months.
Note: you don’t need to rinse this kraut before serving like you do with store-bought. Just use a fork to pull it out, leaving as much brine in the jar as possible, making sure the kraut stays covered with brine. This brine-cap protects the kraut and it will last longer and keep its brighter flavors longer. The lousy kraut from the grocery store is usually packed in about a 5% brine, which is too salty for most tastes and should be rinsed before serving. Better yet, save your money and your taste buds by just making your own.
- 1 wide-mouth mason jar with its wide-mouth ring
- 1 wide-mouth lid or one Fermentools.com airlock lid, seal and airlock
- 12 oz. cabbage, your choice of variety (approx. 1/2 large head)
- 1 qt. distilled or spring water (or other non-chlorinated water)
- 19 g (1 tbsp. + 1.5 tsp.) fine-grain pickling salt, sea salt or other non-iodized salt (we use Fermentools.com Himalayan Pink salt)
- Optional add-ins (choose one)–1 tsp. caraway seeds, 1 tsp. dill seed, 1/2 tsp juniper berries, 1/2 tsp. peppercorns or other spice or herb of your choice.
- Combine water and half the salt in a measuring cup. Stir to dissolve. Set aside.
- Cut up cabbage very small and place in medium bowl. Add remaining half of the salt to cabbage and mix. Add herbs if using and mix to combine. Let cabbage sit and sweat for 10-15 minutes.
- Pack the chopped cabbage into the empty jar until it is about 3/4 full, making sure to add any liquid from the bottom of the bowl. Don’t fill the jar more than 3/4 full because the cabbage will expand during fermentation and soak up the brine.
- If you have a kit from Fermentools.com, put one of the glass weights on top of the cabbage. Pour in enough of the brine to fill to about 1 1/2 inches over the top of the cabbage, which should be about 1 1/2 inches from the top of the jar. Put on the seal, special lid, airlock and your own ring per their instructions. Screw down the ring moderately tight. Discard remaining brine.
- If you don’t yet have the Fermentools.com system, fill jar with brine as described in #4 above, then put the mason jar lid on upside-down (since you don’t want a super-tight seal) then lightly screw on the ring. Discard remaining brine.
- Put the jar in a fairly dark location that’s going to provide a steady temperature of between 67 and 74 degrees Fahrenheit. Leave undisturbed for 3 weeks. After that time, open jar and taste. If it tastes good, and boy will it taste good, replace lid and store it in the fridge.
- Eat within 6 months.
Let us know how it goes! We can’t wait to hear from you.
Denise Wright says
I have a fascination with fermented foods but I’m so afraid of messing up and making me or my family sick. I’ll be sure to check out Fermentools.com….maybe that will give me some assurance. Great post! (found you on SITS ShareFest)
Leah says
You should definitely try it Denise! I was nervous at first too but it is really quite simple as the bacteria do all the work. Plus it’s pretty obvious when things go wrong. Sauerkraut is the easiest thing to start with and pretty hard to mess up so I would definitely start there. Once you make it and taste the difference you’ll never go back to store-bought. Go for it and come back to let me know how it goes!
–Leah
Keisha | The Girl Next Door is Black says
Nice! I love sauerkraut! I was in Berlin last month and it was awesome getting to have it in Germany!
Leah says
That is so great Keisha! I was in Germany many years ago and loved the food but didn’t have any sauerkraut. I’m sure it was delicious!
–Leah
Deanna says
So if I don’t have the kit I can just pour brine water over the cabbage and put a lid on upside down and don’t need a weight on top of cabbage? How do you keep the cabbage from floating to the top?
Thanks DeAnna
Leah says
Hi DeAnna–thanks for your question. The easiest way to keep the cabbage from floating to the top if you don’t have a weight is to cut out a round piece of cabbage (about the width of the jar). After you fill the jar with brine place the “cabbage cover” over the sauerkraut and slightly press it down under the brine. You might still get a few pieces of cabbage floating to the top but that is fine and it will all ferment into delicious sauerkraut. Hope that helps.
–Leah
Deanna says
Thanks Leah,
I will try that next time, I had to throw out my first attempt it started getting a weird pinkish growth on top and didn’t smell right.
Alicia@ eco friendly homemaking says
So glad to have discovered your blog! We have been wanting to make our own sauerkraut for a while now. You have made it sound simple enough that I think I can even accomplish this. We buy raw sauerkraut at Whole Foods and it is pretty pricy. I am really excited for us to make this asap!!
Leah says
Hi Alicia–I’m glad you discovered my blog too! Once you make sauerkraut yourself and see how easy and good it is, you will never buy it again. You’ll also start to think about all the other things you could ferment. Good luck.
–Leah
Mera says
Thanks so much for this! I was just thinking I need to start making my own as I bought a jar from Whole Foods a few days ago. I made my own Kim-chee many years ago and it was okay…the spice and over-salting was my issue but I think sauerkraut would be ever better.
I found you on SITS Sharefest!
Leah says
You’re welcome, Mera! Sauerkraut is a really good place to start your fermenting experiments. And I do mean experiments since fermenting is as much of an art as it is a science. Your goal is to make it taste how you like it and the good news is that the cost of failure is just a bit of cabbage, so very low. Have fun and let me know how it goes.
–Leah
Lisa says
This brings back memories of travelling in Europe and family meals in Germany. I remember the sauerkraut there being a vibrant red but 1. my memory could be dodgy, I was younger and more prone to putting braincells at risk.. or 2. different cabbage?
Leah says
Hi Lisa–my memories of Europe are often food based too although I never tried sauerkraut in Germany. Yeah, not sure how that’s possible but it sure wouldn’t be the case now. The likely explanation is that they used red or purple cabbage which taste the same but does make the sauerkraut really vibrant and pretty. Thanks for stopping by!
–Leah
Rebecca says
Wow, this looks so easy. We love sauerkraut and just had it last week but this would be so much better. Thanks for sharing. Visiting from the Sits Girls.
Leah says
Hi Rebecca–thanks for stopping by. Sauerkraut really is easy and hard to mess up even if you’ve never fermented before. The homemade stuff is a completely different and better product than store-bought. Definitely try it!
–Leah
dennis hill says
We would use the crock method or the zinc lit/rubber ring. Since we have gotten older were were looking for a different kraut in a jar and this one looks good. Thanks.